Restaurant Menu Design: The Complete Guide for 2026
A restaurant’s menu is the most important piece of marketing it will ever produce. It’s the one thing every customer interacts with. It shapes what people order, how much they spend, and how they perceive the restaurant as a whole. A great menu design makes the food sound better, the experience feel more premium, and ordering easier. A poor one creates confusion, cheapens the brand, and leaves money on the table.
This guide covers every aspect of restaurant menu design, from foundational principles to specific tactical decisions about typography, color, layout, photography, and digital optimization. Whether you’re designing a menu for the first time or refreshing one you already have, the principles here apply.
The foundational principles
Good menu design isn’t about making something pretty. It’s about making something functional that also happens to look great. These five principles are behind every well-designed menu:
1. Clarity over creativity
The menu’s primary job is to communicate what’s available and how much it costs. Every design decision should serve that goal. Creative flourishes that make items harder to find, prices harder to read, or categories harder to distinguish work against the menu’s purpose, no matter how visually appealing they are.
This doesn’t mean menus should be boring. It means design creativity should enhance communication, not compete with it.
2. Hierarchy guides the eye
Customers don’t read menus the way they read a book (top to bottom, left to right). They scan. Research on eye-tracking shows that diners look at menus in patterns influenced by layout, typography, and visual weight. A well-designed hierarchy ensures that the most important elements (category headers, featured items, prices) are the first things the eye lands on.
3. Less is almost always more
The instinct to fill every inch of space with items, descriptions, photos, or decorative elements is strong. Resist it. White space (the empty area between elements) is a design tool, not wasted space. It improves readability, creates visual breathing room, and directs attention to what matters.
4. Consistency builds trust
Consistent formatting across categories and items signals professionalism. When every item follows the same pattern (name, description, price, in the same style and position), customers trust the menu and navigate it effortlessly. Inconsistency (different font sizes, random bolding, prices in different positions) creates cognitive friction.
5. The menu is part of the brand
A fine dining restaurant with a Comic Sans menu has a brand problem. The menu should feel like a natural extension of the restaurant’s identity: its decor, its service style, its personality. When there’s alignment between the physical space and the menu design, the entire experience feels cohesive.
Typography
Typography is the single most impactful design element on a menu. It does more to set the tone and ensure readability than color, photography, or layout combined.
Choosing fonts
Serif fonts (like Garamond, Georgia, or Playfair Display) convey tradition, elegance, and sophistication. They work well for fine dining, steakhouses, and upscale establishments.
Sans-serif fonts (like Inter, Helvetica, or DM Sans) feel modern, clean, and approachable. They work for casual dining, cafes, fast casual, and most digital menus.
Display fonts (decorative, handwritten, or stylized) should be used sparingly: for the restaurant name, category headers, or a single accent element. Never for body text or item descriptions.
The two-font rule: Most menus work best with exactly two fonts: one for headers and one for body text. Three fonts can work if one is used very sparingly (like a script font for the restaurant name). More than three creates visual chaos.
Font sizes
For print menus:
- Category headers: 14-18pt
- Item names: 11-13pt
- Descriptions: 9-11pt
- Prices: Match the item name size
For digital menus:
- Category headers: 20-28px
- Item names: 16-20px
- Descriptions: 14-16px
- Prices: 16-20px (matching item names)
These are starting points. The key principle: item names and prices should be immediately scannable. Descriptions are secondary and can be smaller.
Font weight and style
- Bold item names so they stand out from descriptions
- Regular weight for descriptions to keep them secondary
- Avoid italics for long text. It’s harder to read, especially on screens
- Use italic sparingly for things like foreign words, wine varietals, or brief notes
Line spacing
Cramped text is the most common typography mistake on menus. Line spacing (leading) should be 130-150% of the font size. If your body text is 10pt, the line spacing should be 13-15pt. This applies to both print and digital.
Color
Color on a menu does three things: establishes mood, creates visual hierarchy, and influences appetite. It should be intentional, not decorative.
Color psychology for restaurants
- Red and orange stimulate appetite and create urgency. Common in fast food and casual dining. Use sparingly in upscale settings.
- Green signals freshness, health, and natural ingredients. Effective for farm-to-table, vegetarian, and health-focused concepts.
- Black and dark gray convey sophistication and premium quality. Standard for fine dining.
- Warm neutrals (cream, beige, warm white) feel inviting and comfortable. Versatile across restaurant types.
- Blue suppresses appetite (there are very few naturally blue foods). Avoid as a dominant menu color.
Practical color guidelines
Limit your palette. Two to three colors maximum, plus black/dark gray for text. Any more and the menu feels chaotic.
Maintain contrast. Text must be easily readable against its background. Dark text on light backgrounds is the safest choice. Light text on dark backgrounds works but requires more careful attention to contrast ratios. Test with WCAG contrast checkers.
Use accent colors purposefully. If you use a color to highlight specials, use it only for specials. If prices are in a specific color, all prices should be in that color. Consistent color use becomes a navigation tool.
Be cautious with colored backgrounds. A subtle warm tint to the background can add warmth. A saturated colored background makes text harder to read. When in doubt, keep backgrounds neutral.
Layout and structure
Layout is how you organize information on the page (or screen). It determines the order in which customers encounter items and how easily they can find what they’re looking for.
The anatomy of a menu layout
Every menu layout, regardless of style, includes these structural elements:
- Header: restaurant name, logo, and any essential info
- Categories: major groupings (Appetizers, Mains, Desserts, Drinks)
- Items: the individual dishes within each category
- Prices: the cost of each item
- Footer: legal disclaimers, allergen notes, contact info
Print layout principles
Single-panel menus (one page, front only) work for small menus (under 15 items). They’re simple and keep everything visible at once.
Bi-fold menus (two panels) are the most common format for sit-down restaurants. The inside panels get the most visual attention. Put your highest-margin items there.
Tri-fold menus (three panels) work for larger menus but require careful organization to prevent overwhelm. Use the center panel for star items.
The golden triangle is a concept from menu engineering: diners’ eyes tend to land first in the middle of the menu, then move to the top right, then top left. Place your most profitable items in these positions.
Digital layout principles
Digital menus operate differently than print because they’re viewed on a phone screen, a vertical, scrollable surface about 3 inches wide. The print rules don’t fully apply.
Single-column layouts are mandatory. Multi-column layouts don’t work on phone screens, period.
Category navigation (a sticky header or sidebar with category links) is critical for menus with more than 2-3 sections. Customers should be able to jump to “Desserts” without scrolling through 40 entrees.
Above the fold matters. The first thing visible when the menu loads sets expectations. A featured item, the restaurant’s brand identity, or the first category should be immediately visible, not a giant hero image that pushes content below the fold.
Scroll depth is real. Items at the bottom of a long digital menu get less attention. If you have items you want to promote, move them higher. Or use a “Featured” section at the top that surfaces key items regardless of category.
Item descriptions
How you describe each dish matters more than most restaurant owners think. Descriptions influence what people order, set expectations, and shape your brand voice.
The anatomy of a good description
A strong menu description includes:
- Key ingredients: what the dish is made of (not every ingredient, but the stars)
- Preparation method: how it’s cooked (grilled, braised, roasted, hand-pulled)
- Sensory language: a word or two that evokes taste, texture, or aroma
- Origin or story (optional): where an ingredient comes from or why the dish exists
Example: “Pan-seared Scottish salmon with roasted fingerling potatoes, charred broccolini, and a bright lemon-caper butter.”
That description tells the customer exactly what to expect while making it sound appetizing. Compare that to: “Salmon served with potatoes and vegetables.” Same dish, completely different perception.
Length guidelines
- Fine dining: 15-25 words per item. Longer descriptions are expected and appropriate.
- Casual dining: 8-15 words. Enough to inform, not so much that it slows scanning.
- Fast casual / food truck: 0-8 words, or no descriptions at all. Speed is the priority.
- Digital menus: Lean shorter. Screen space is limited, and scrolling through lengthy descriptions on a phone is tedious.
What to avoid
- Clichés: “Our famous…” “Cooked to perfection…” “A delightful blend of…” These phrases say nothing and fill space.
- Ingredient lists: “Chicken, rice, broccoli, soy sauce, sesame seeds, ginger, garlic.” That’s a recipe ingredient list, not a description.
- Superlatives: “The best burger in town.” Let the food speak for itself.
- Technical jargon: “Prepared sous vide at 57°C for 24 hours.” Most customers don’t know or care about the technique. Describe the result instead: “Slow-cooked for 24 hours until impossibly tender.”
Pricing display
How you display prices affects perception and ordering behavior. This is one of the most studied aspects of menu psychology.
Drop the dollar sign
Research consistently shows that removing the dollar sign (or any currency symbol) from menu prices leads to higher spending. “32” feels like a number. “$32.00” feels like money leaving a wallet. Most upscale restaurants have adopted this practice. Casual restaurants can go either way.
Price placement
- Right-aligned prices (at the end of a dotted leader line) are traditional and functional. Everyone knows where to look.
- Inline prices (placed right after the item name) are becoming more common on modern menus. They feel less transactional.
- Avoid price columns. When all prices are vertically aligned in a column, customers scan the price column and order the cheapest option. Stagger prices within descriptions to prevent this behavior.
Price anchoring
Place a premium-priced item at the top of each category. This “anchor” makes everything else look more reasonable by comparison. A $48 steak at the top of the menu makes a $32 chicken dish feel like a value, even though $32 for chicken is objectively expensive. This works on both print and digital.
Charm pricing vs. round numbers
- Charm pricing ($9.99, $14.95) works for fast casual and value-oriented restaurants. It signals affordability.
- Round numbers ($10, $15, $32) work for upscale and mid-range restaurants. They feel cleaner and more confident.
Pick one approach and be consistent. Mixing $9.99 and $15 on the same menu creates a disjointed feeling.
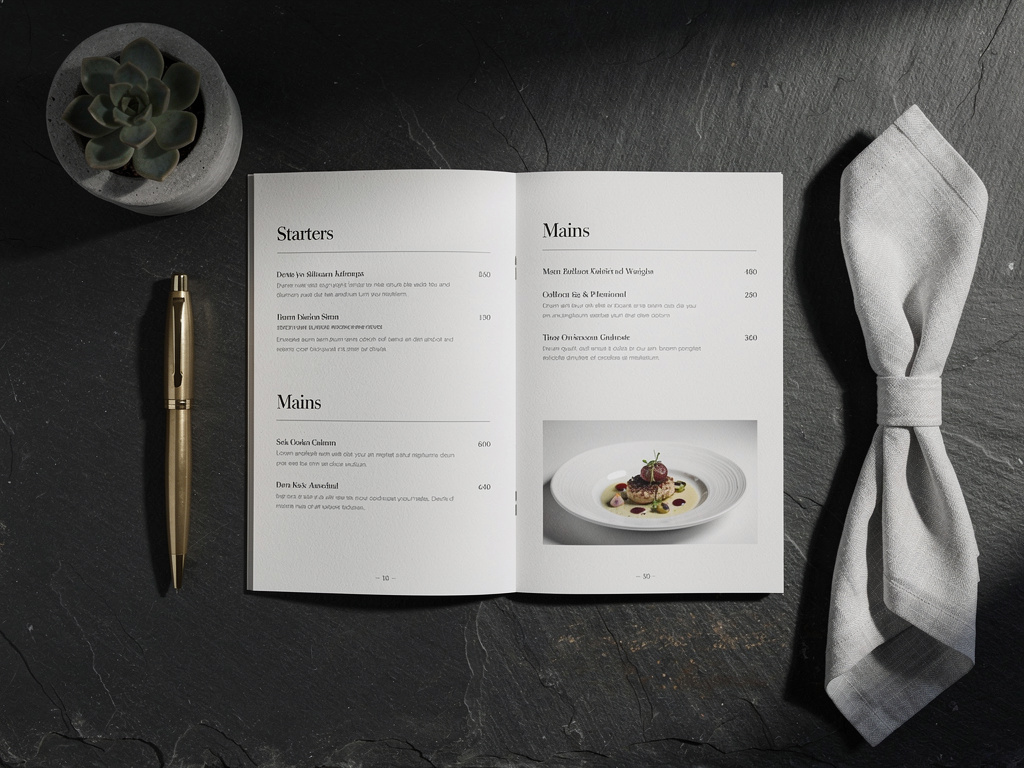
Photography
Photos on menus can dramatically increase orders for pictured items. Studies show up to 30% more orders for items with photos. But bad photos hurt more than no photos at all.
When to use photos
- Casual dining and fast casual: Photos work well. Customers expect them and use them to make decisions.
- Fine dining: Generally no photos. The typographic, descriptive approach is standard and expected. Photos can feel commercial.
- Digital menus: Photos are more effective on digital menus than print because they can be high-resolution, full-color, and don’t increase printing costs.
What makes a good menu photo
- Overhead or 45-degree angle. These are the most appetizing perspectives for food photography.
- Natural or warm lighting. Harsh flash or fluorescent lighting kills appetite appeal. Soft, directional light makes food glow.
- Simple backgrounds. A clean surface or subtle texture. The food is the subject, and the background shouldn’t compete.
- Steam, texture, and shine. Photos that convey freshness, warmth, and texture outperform flat, static shots.
- Consistent style. All photos on the menu should share the same lighting, angle, and editing style. Mixed styles look unprofessional.
Phone photography tips
Professional food photography is ideal, but not always in the budget. If you’re using a phone:
- Shoot near a window during the day for natural light
- Use portrait mode to blur the background
- Keep the background clean by clearing away clutter
- Edit lightly (brightness and contrast) but don’t over-filter
- Shoot at the restaurant, not at home. The environment adds context
How many photos
More isn’t always better. For a 40-item menu:
- Print: 5-8 photos maximum. More than that and the menu feels like a catalog.
- Digital: 10-15 photos is fine if they’re high quality. You have more real estate and zero printing cost.
- Feature photos strategically. Photograph your highest-margin items and signature dishes. Every photo is an implicit recommendation.
Menu psychology
Menu design borrows from behavioral psychology in ways that directly affect revenue. These techniques aren’t manipulative. They’re about presenting options in a way that helps customers make satisfying decisions.
The menu engineering matrix
Every item on your menu falls into one of four categories based on profitability and popularity:
- Stars (high profit, high popularity): your best items. Feature them prominently.
- Puzzles (high profit, low popularity): great margin but underordered. Improve their visibility through placement, photos, or better descriptions.
- Plow horses (low profit, high popularity): customers love them, but they don’t make you much money. Keep them on the menu but don’t promote them. Consider modest price increases.
- Dogs (low profit, low popularity): candidates for removal or reinvention.
Understanding which items fall where is the first step. Menu design is how you act on that knowledge by promoting stars and puzzles while de-emphasizing plow horses.
Visual highlighting
Drawing the eye to specific items works. Common techniques:
- Boxes or borders around featured items
- Background shading behind a recommended dish
- “Chef’s Pick” or “House Favorite” labels: these work because they provide social proof and reduce decision fatigue
- Icons for dietary information (vegetarian, gluten-free, spicy). These double as navigation tools
Use these sparingly. If everything is highlighted, nothing is.
Section order
The first and last items in each section receive the most attention (a well-documented psychological effect called the serial position effect). Place your highest-margin items in these positions.
The order of sections themselves also matters. Most customers look at appetizers first, so placing a “Featured” or “Chef’s Selection” section before appetizers captures attention at its peak.
Choice architecture
Too many choices lead to decision paralysis. Research suggests that 7-10 items per category is the sweet spot for most restaurant formats. If a category has 20 items, consider splitting it into subcategories (e.g., “Pasta” and “From the Grill” instead of one massive “Entrees” section).
For digital menus, this is even more critical because scrolling through a long flat list is exhausting on a phone. Subcategories with their own headers break the content into digestible chunks.
Print vs. digital: design considerations
The rise of QR menus hasn’t killed print, but it has changed what “menu design” means. Most restaurants in 2026 need to think about both formats.
Where print still wins
- Tactile experience. A beautifully printed menu on quality paper stock contributes to the ambiance in ways a phone screen can’t match.
- No technology barriers. Every customer can use a paper menu. Not everyone is comfortable scanning a QR code.
- Fine dining expectations. In high-end settings, a physical menu is often part of the experience.
Where digital wins
- Instant updates. Change a price, remove an item, add a seasonal special, all live within seconds. No reprinting.
- Cost over time. No printing expenses. A digital menu that costs $12/month is cheaper than quarterly print runs within the first year.
- Multimedia. Photos, videos, allergen filters, multilingual support. Digital menus can do things print physically can’t.
- Analytics. See which items get the most views, when customers browse, and how they navigate the menu. This data informs menu engineering decisions.
- Accessibility. Adjustable text size, screen reader compatibility, and high contrast modes.
The hybrid approach
Most restaurants benefit from having both: a primary digital menu via QR code, and a simplified print menu available on request. The digital version gets the full treatment (photos, descriptions, dietary information, multiple languages). The print version is a streamlined reference that covers the essentials.
This approach serves all customers: those who prefer digital get a rich experience, and those who prefer paper still have an option.
Common design mistakes
Cramming too much
The most common mistake by a wide margin. When every square inch is filled with text, photos, borders, and decorative elements, the customer’s eye has nowhere to rest and no clear path through the information. White space is not wasted space. It’s a design tool.
Inconsistent formatting
When the first section uses bold item names and the third section uses italic item names, customers notice, even subconsciously. Inconsistency erodes trust and makes the menu feel thrown together.
Poor photo quality
A dark, blurry photo of a dish does more harm than no photo at all. It makes the food look unappetizing and the restaurant look careless. If you can’t get quality photos, skip them and rely on typography and descriptions.
Ignoring mobile
Designing a digital menu on a desktop monitor and assuming it’ll look fine on a phone is a recipe for disaster. Always design and test on an actual phone. That’s where 95%+ of customers will see it.
Novelty over function
Menus shaped like records, printed on wood, or folded into origami might be Instagram-worthy, but they’re often terrible to actually use. If a design choice makes the menu harder to read, hold, or navigate, it’s not worth it, no matter how clever it is.
Forgetting accessibility
Small text, low contrast, and fancy fonts exclude customers with vision impairments. Minimum font size should be 9pt for print and 14px for digital. Contrast ratios should meet WCAG AA standards (4.5:1 for body text).
Designing your menu: a practical workflow
For restaurant owners or designers ready to build, here’s a step-by-step workflow:
1. Audit your current menu
Review what you have. Identify what works, what doesn’t, and what’s missing. If possible, gather feedback from staff (they hear customer complaints) and review analytics if you have a digital menu.
2. Organize your content
Structure your categories, items, descriptions, and prices in a spreadsheet or document before touching any design tool. Design decisions should follow content decisions, not the other way around.
3. Choose your format
Print, digital, or both? This decision affects everything downstream, from typography choices to photo strategy to budget.
4. Select a template or design direction
Starting from a template is smart for most restaurants. It provides a professional foundation and saves design time. MenuStack offers curated templates across different restaurant styles, with an AI menu builder that can populate the template with your content in minutes. Even if you’re working with a designer, a template can serve as a starting point for customization.
5. Apply the principles
Walk through each principle covered in this guide: typography, color, layout, descriptions, pricing display, photography, and psychology. Make deliberate choices at each stage.
6. Test with real users
Show the menu to people who aren’t involved in the design process. Watch how they navigate it. Ask them to find specific items. Note where they get confused or stuck. This feedback is more valuable than any design critique.
7. Print or publish
For print: work with a quality printer. Paper stock matters. It affects how the menu feels, how colors appear, and how durable it is. Matte finishes hide fingerprints better than gloss.
For digital: test on multiple phone models and screen sizes. Check load times. Verify that all links and navigation elements work.
8. Iterate
No menu is final. Plan to revisit the design at least twice a year: once to refresh seasonal content, and once to apply lessons learned from analytics, customer feedback, and evolving design trends.
The bottom line
Restaurant menu design pulls from graphic design, psychology, marketing, and hospitality. Getting it right doesn’t require a design degree. It requires understanding the principles, making intentional choices, and testing against real customer behavior.
The best menus share a few things in common: they’re easy to read, they guide customers toward satisfying choices, they reflect the restaurant’s identity, and they’re maintained with the same care as the food itself. Whether printed on linen stock or displayed on a phone screen, those fundamentals don’t change.
Start with clarity, layer in personality, and keep tweaking. A menu is never really finished.